


A clutch complaint on an HGV doesn't tell you which part has failed. The driven plate may be worn out, but the same slip or judder can come from a servo leaking air, a concentric actuator that lost its calibration after a repair, or a flywheel that has run hot. Only the worn plate and the flywheel need the gearbox out.
Get it wrong, and either the driveline comes apart for a fault a servo repair kit would have fixed, or a new clutch goes in on top of the rear seal leak that ruined the old one, and the truck is back in the bay within months.
In this article, we will detail the steps required to identify, understand, and repair your clutch components. Keep reading to learn more…
How to identify the clutch and actuation system
Before you diagnose anything, find out how the clutch is built and how it's operated. The chassis number and the gearbox plate will give you both.

Two actuation layouts covered in this guide · simplified
A pedal-operated system puts a master cylinder, a servo and a release fork between the driver's foot and the release bearing, and any of them can fail. On a ConAct truck one electronically controlled actuator does that whole job, so the first tool you reach for is the diagnostic kit.
Single or twin plate, push or pull
Our clutch kit range runs from 300mm, for lighter Isuzu applications, up to 430mm for heavy tractor units. Twin plate clutches add a second driven plate and an intermediate plate, which buys extra friction area without going up in diameter; the Volvo and Renault Trucks 400mm twin pull kits are two examples.
Push or pull decides how the clutch comes apart. A push-type release bearing presses the diaphragm spring fingers towards the flywheel. A pull-type bearing is locked into the cover and draws the fingers away from it, so it has to be unclipped before the gearbox will come back. Kit descriptions say which type they are, and the two aren't interchangeable.
How the clutch is operated
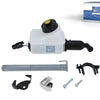
On a manual gearbox the pedal works a hydraulic master cylinder, which feeds a clutch servo on the bellhousing (it's also sold as a clutch booster). The servo uses air from the vehicle's system to push the release fork. So a fault can start in the hydraulics, in the air supply or in the servo itself, all before you get near the friction parts. We stock EBS clutch servos and servo repair kits, along with master and slave cylinders.
Some applications drop the fork and servo altogether and fit a release cylinder around the gearbox input shaft. ZF's ConAct (Concentric clutch Actuator) is the pneumatic version used on automated transmissions, ZF TraXon among them. It's operated by a solenoid valve under the control of the vehicle electronics, and it replaces both the hydraulic parts and the clutch booster. Check whether your replacement kit already includes one. Our Renault Trucks and Volvo 430mm single push kit does.
Automated gearboxes are now common on heavy trucks, and with no clutch pedal there's no bite point to feel. Scania's Opticruise is electro-hydraulic: a screw drives a piston that builds hydraulic pressure in the clutch. Other makers use electro-pneumatic actuators, which open the clutch with air and close it with a spring.
Self-adjusting clutches
Sachs XTend clutches take up lining wear themselves and keep the release position where it should be as the driven plate wears. Several of our kits are XTend, including MAN and Mercedes-Benz 430mm and DAF 395mm applications. The adjusting mechanism changes how the cover goes on (step 6 of the fitting list).
Understanding the symptoms
Drivers describe the symptom, and it's down to you to work out whether the friction parts or the actuation are to blame. Ask when it happened (laden or empty, cold or hot, uphill or on the flat) and whether it crept up over weeks or arrived overnight. Gradual change suggests wear. A sudden one points more towards a leak or lost calibration.
|
Symptom |
Friction-side causes to consider |
Actuation-side causes to consider |
|---|---|---|
|
Slip under load (revs rise, road speed doesn't) |
Linings worn to the limit, oil or grease on the linings, heat-damaged facings, weak pressure plate |
Clutch not fully engaging: sticking servo or actuator, incorrect free play on adjustable systems, self-adjuster fault |
|
Judder pulling away |
Oil on the linings, flywheel face tapered or heat-spotted, broken torsion damper springs |
Actuator out of calibration (ZF lists grabbing on setting off as a sign), engine or gearbox mounts |
|
Drag, crunching or hard gear selection |
Driven plate sticking on the input shaft splines, distorted plate |
Air in the hydraulics, low fluid, servo air or fluid leak, short release travel |
|
Noise that changes when the clutch is operated |
Release bearing or spigot bearing wear |
Worn fork or pivot, dry fork contact points |
|
Clutch warning or fault code on an automated gearbox |
Wear limit reached on the driven plate |
Actuator, position sensor or solenoid valve fault, calibration lost after repair |
|
Air leak at the bellhousing |
None |
Servo or actuator seals |
Clutch slipping
Slip shows up first where torque is highest: laden pull-aways, gradients and the top of the rev range in the high gears. If the kit is only a few months old, look for oil on the linings, or an actuation fault holding the clutch partly released, before you blame the friction material.
Clutch judder
Check the engine and gearbox mounts first, because judder doesn't always come from the clutch. When it does, oil contamination and flywheel wear are the usual causes, and a new kit fitted without fixing either one will judder too.
Ruling out actuation faults
All of these checks can be done with the gearbox still in the truck. A new clutch kit won't cure an actuation fault, so clear them first.

Diagnosis order for an HGV clutch complaint · 2 decisions
The gearbox comes out only once these checks have failed to clear the fault.
Hydraulics and fluid
On pedal-operated systems, check the reservoir level and look at the fluid. Dark or contaminated fluid attacks the seals in the master cylinder and servo, and a low level means a leak you'll need to trace. Top up with the fluid named on the reservoir cap or in the manufacturer's data and nothing else: clutch systems don't all take the same type, and mixing them can damage seals.
Air in the hydraulics gives a soft pedal and short release travel, which drives exactly like a dragging clutch. Bleed the system and road test it again before going any further.
Air supply and servo
Bring the system up to normal working pressure, hold the clutch down and listen around the servo for escaping air. An air leak means a heavy pedal and incomplete release; fluid weeping from the servo means its hydraulic seals have gone. Servos can often be rebuilt with an EBS repair kit or boot kit for the common types, and we stock complete units too.
If the servo has a wear indicator on its body, read it before you condemn the clutch. It's there to signal when the clutch is reaching its wear limit, so it can confirm or rule out a worn driven plate without stripping anything. How you read it depends on the servo, so check the maker's data.
Automated gearboxes
On a two-pedal truck, start with diagnostic equipment that covers the make. Fault codes for the actuator, position sensors or solenoid valves narrow the job down, and some systems show clutch wear or actuator position as live data. Has the clutch or actuator been worked on recently? If it wasn't calibrated afterwards, that alone can cause grabbing on pull-away and poor control under load.
How to remove the gearbox and clutch safely
Follow the manufacturer's removal sequence for the truck, and release the air pressure in each circuit before you disconnect its lines.
Take the gearbox weight on a transmission jack before the last bellhousing bolts come out, and keep it there until the input shaft is fully clear. A gearbox left hanging on its input shaft loads the driven plate hub and can damage the hub and splines, whether it's on the way out or the way back in.
Transmission jacks count as lifting equipment under the Lifting Operations and Lifting Equipment Regulations 1998 (LOLER, SI 1998/2307). They must be strong and stable enough for the load, and a competent person has to examine them thoroughly at intervals and keep a record.
On a pull-type clutch, unclip the release bearing from the cover first, usually through an inspection aperture in the bellhousing. Draw the gearbox back with the bearing still engaged and you risk damaging the bearing, the cover or both. Each make has its own method.
With the gearbox clear, slacken the cover bolts a turn or two at a time, working diagonally, so the diaphragm load comes off evenly. Support the cover and driven plate as the last bolts come out. On a twin plate clutch, note which way round the intermediate plate sits.
Reading the failed parts for the root cause
Before anything gets cleaned, lay the old parts out in order under good light. They'll show you why the clutch failed, and whatever caused it has to be put right before the new kit goes in.
|
What you find |
What usually caused it |
Deal with it before refitting |
|---|---|---|
|
Oil or grease on the driven plate linings |
Leak from the crankshaft rear seal or the gearbox input shaft seal; too much spline grease |
Replace the leaking seal. A contaminated plate can't be cleaned and reused |
|
Cracked, glazed or burnt facings; blue marking on the flywheel or pressure plate |
Prolonged slip from overloading, slipping the clutch on pull-away, or incomplete engagement |
Check the actuation side for a fault holding the clutch partly released; check the flywheel for heat damage |
|
Worn or stepped hub splines |
Misalignment between engine and gearbox, a bent input shaft, worn gearbox bearings, or a gearbox left hanging during fitting |
Check the input shaft, spigot bearing and gearbox bearings |
|
Broken or loose torsion damper springs |
Excessive engine or driveline vibration |
Check engine and gearbox mounts and the driveline |
|
Scoring, hot spots or cracks on the flywheel face |
Heat from slip; a worn flywheel face also causes judder on a new clutch |
Assess the flywheel (next section) |
|
Uneven wear on the diaphragm spring fingers |
Release bearing running off-centre: worn fork, pivot or guide sleeve |
Replace the worn release parts |
|
Rough, noisy or collapsed release bearing |
Wear, heat or lost lubrication |
Replace it as part of the kit |
Keep the old parts until the job is signed off. If the same failure comes back, they're your evidence for a warranty claim.
Deciding what to replace
Most of the labour on a clutch job goes into getting the gearbox out, and it's the same whether you fit a driven plate alone or renew everything behind the bellhousing. Put a worn part back now and you're doing the same strip-down again later.
So fit the full kit. A new driven plate running against an old cover and release bearing mixes parts at different stages of wear, and you can't properly judge a cover's clamp load or a bearing's remaining life on the bench. Kit contents vary, so check whether the release bearing or actuator is included before you order.
The flywheel
ZF Aftermarket advises inspecting the flywheel at every commercial vehicle clutch change, and treats replacing it at the same time as the safest option. The friction face wears into a taper of only a few tenths of a millimetre, which is enough to make a new clutch engage jerkily. Look for hot spots and cracks on the face. Check the starter ring gear as well, since it takes wear from the starter pinion every time the engine is started. Machine the face only where the manufacturer allows it, and within its published limits.
Our flywheels come from DT, Lipe and Sachs, and we carry flywheel housings and gaskets too.
Everything else behind the bellhousing
Renew the release bearing with every clutch, and check the fork, pivot and guide sleeve while you're there: wear in any of them runs the bearing off-centre and wears the diaphragm fingers unevenly. Replace the spigot bearing if it feels rough or loose on the input shaft. Release bearings and forks are in our full clutch range.
Any servo, slave cylinder or concentric actuator that leaked or stuck during diagnosis should be replaced or rebuilt now. And if oil reached the old linings, replace the seal it came from, or the new kit will go the same way.
How to fit the new clutch correctly
Grease on a lining, a disc fitted backwards or a gearbox forced home can each ruin a new clutch before it's turned a wheel. Fit it in this order.
-
Wipe the flywheel face and the new pressure plate face with brake cleaner to remove any protective coating and fingerprints. From here on, keep oil and grease away from the driven plate linings.
-
If you're replacing the spigot bearing, drive it in with a drift or sleeve that bears on the outer race only.
-
Check which way round the driven plate goes. Plates are normally marked for the flywheel side, and one fitted backwards can foul the flywheel or the cover.
-
Centre the plate with a clutch alignment tool that matches both the hub spline and the spigot bearing bore. If the plate is off-centre, the input shaft won't go in, and someone will be tempted to force it.
-
Locate the cover on its dowels and tighten the bolts a little at a time in a diagonal pattern. Take the torque figure and sequence from the manufacturer's data or the kit instructions, and don't run any bolt fully home before the others.
-
On a Sachs XTend cover, follow Sachs' fitting instructions to the letter. The self-adjusting mechanism has its own fitting steps, and getting them wrong defeats the adjuster.
-
Lubricate the input shaft splines only as the kit manufacturer specifies. Excess grease ends up on the new linings.
-
Slide the gearbox home square and fully supported on the jack. Never draw it in with the bellhousing bolts, and never let it hang on the input shaft.
-
On a pull-type clutch, engage the release bearing into the cover by the manufacturer's method, and check it's locked in before you connect the actuation.
Setting up, calibrating, and road testing
Bleed the hydraulics, bring the air system up to pressure and check the servo or actuator for leaks with the clutch operated. If the system has an adjustable pushrod or free play setting, set it to the manufacturer's figure. Some take up free play automatically, so find out which kind you have before reaching for a spanner.
An automated gearbox has to learn where the new clutch engages. ZF states that its ConAct releaser must be calibrated with suitable diagnostic equipment after installation, to the vehicle manufacturer's specifications.
Without that you may get a fault message on the dash, grabbing as the truck sets off and poor control when manoeuvring under load. Other makes and actuators have their own teach-in or adaptation routines; run whichever one the manufacturer specifies before the truck goes back out.
Road test it laden if you can, because slip and judder often only appear under load. Pull away on the flat and on a gradient, go up through the gears, select reverse and make a slow manoeuvre. Then look again for fluid or air leaks, and recheck the reservoir level.
Recording the job on the vehicle file
On an operator-licensed vehicle, a clutch change goes on the maintenance file like any other repair. DVSA's Guide to maintaining roadworthiness requires safety inspection and repair records to be kept for at least 15 months, and the operator is still responsible for the vehicle's condition when the work is contracted out.
At a minimum the job card should show the date, odometer reading, reported defect, what you found and what you fitted, with part numbers. Write the finding in plain words, such as "oil leak from crankshaft rear seal" or "heat cracking on flywheel face". That's what answers questions at a DVSA maintenance investigation, and it tells the next technician what was done if the symptom returns. Our guide to operator licence maintenance records covers the rest of what an operator's file needs.
Frequently asked questions
How long does an HGV clutch last?
It depends on how the truck is worked and who drives it. One haulier's transport manager told Transport Engineer that his automated trucks get 450,000 to 600,000km from a clutch, and that on a manual it's impossible to predict because so much comes down to the driver. That's one fleet's figure. Your own service history is a better guide for planning.
Should you replace the flywheel when you change an HGV clutch?
Inspect it every time. ZF Aftermarket sees replacing it with the clutch as the safest approach, since a tapered friction face can make a brand new clutch judder.
Can a faulty clutch servo make the clutch slip?
Yes. A servo or actuator that sticks and stops the clutch engaging fully leaves the pressure plate short of its full clamp load, so the clutch can slip with plenty of lining left.
Do automated gearboxes need calibrating after a clutch change?
ZF's ConAct releaser must be calibrated after installation, and other systems have their own adaptation routines. The manufacturer's procedure for the gearbox will tell you which applies.
Order the right clutch parts for your truck
Have the make and model, clutch diameter, plate count and push or pull type to hand when you order. Add anything else the strip-down turned up, whether that's a flywheel, release parts, a seal or an actuation part.
-
Clutch kits for DAF, Iveco, Isuzu, MAN, Mercedes-Benz, Renault Trucks, Scania and Volvo, from Sachs, Valeo and DT
-
Flywheels and flywheel housings
-
Clutch servos, servo repair kits and boot kits
-
Clutch master and slave cylinders and repair kits
-
Release bearings, forks and the rest of our clutch range
If you're not sure which kit fits, call 01527 68279 with the chassis number.
Resources
DVSA: Guide to maintaining roadworthiness | ZF Aftermarket: Calibrating ConAct | Motor India: ZF's ConAct hits 4 million production mark | Transport Engineer: Clutches and transmissions, halfway house | Transport Engineer: ZF recommends replacing flywheel when changing clutch | SAE: Xtend, a new concept for automatic wear compensation in clutches | Transport Operator: When a truck needs a clutch | Borg & Beck: Clutch component failure diagnosis


