In a hurry? Here are the things you need to know:
- The legal minimum brake pad thickness is 1.5mm, but the industry standard for replacement is 3mm. By the time you're at 1.5mm, your safety margin is almost gone
- Since April 2025, unladen roller brake tests are no longer accepted by the DVSA. You now need at least four laden tests per year, with the vehicle loaded to 65% of its design axle weight
- Always replace pads in axle sets and bed them in with around 30 moderate stops. Skipping this causes glazing and reduced braking performance
- If one pad on an axle is wearing significantly faster than the other, the problem is almost always the calliper (seized slide pin or stuck piston), not the pad. Fix the calliper before fitting new parts or you'll be back in the same place within a few thousand kilometres
Most HGV prohibitions at roadside checks aren't the result of catastrophic mechanical failure. They're brake pads that have been at 2 mm for weeks while the vehicle kept getting sent out.
This guide is for mechanics and transport managers who know the basics but want a solid reference for what to look for, what the numbers mean, and where the DVSA's updated requirements sit after the April 2025 changes.
Disc brakes vs drum brakes
Most modern HGVs use disc brakes on the steered axle and increasingly on the drive axle too. Drum brakes still turn up on trailers, some older trucks, and certain rear axle configurations. The inspection process differs, but the underlying issue is the same in both: friction material wears down, and at some point there isn't enough left.
On a disc setup, the parts to consider are the pad, the disc, the calliper, and the wear indicator. Mechanical indicators are a metal tab that contacts the disc and squeals when the pad gets low. Electronic ones are a sensor wire that grounds out at a preset depth and triggers a dashboard light. Both work, but neither replaces a physical measurement.
Something important to remember is delamination. The friction material and the backing plate are bonded together, and that bond can fail before the pad wears to its minimum. If there's any separation between the two layers during inspection, that pad comes off regardless of what the thickness reads.
HGVs use air-actuated brakes rather than hydraulic. The actuation principle is different, but the wear mechanics on the pad are identical. The main difference is scale.
A loaded 44-tonne artic puts an enormous amount of energy through its brakes every time it stops. A lorry on city distribution work might need new pads at 30,000 to 40,000 km. A unit that mostly runs motorway miles might get 80,000 km from the same spec. Some will get more. Kilometre intervals alone won't tell you when pads need replacing. You have to measure them.
What the DVSA requires, and what changed in April 2025
The DVSA's Guide to Maintaining Roadworthiness requires a brake performance assessment at every safety inspection.
That hasn't changed, but what has changed on 1st April 2025 is that unladen roller brake tests are no longer accepted as evidence of braking performance. The requirement now is a minimum of four laden tests per year, with the vehicle loaded to at least 65% of its design axle weight.
The annual MOT counts as one of those four, so in practice you need three additional laden tests across the year.
An EBPMS (Electronic Braking Performance Monitoring System), where fitted, is an accepted alternative. It provides a brake performance assessment at each inspection without booking a roller brake tester.
But EBPMS measures braking performance, not pad thickness, so a vehicle can pass an EBPMS assessment and still have pads that are two weeks from failure. The two things are not measuring the same thing, and one does not replace the other.
On thickness limits, 1.5mm is the legal minimum in the UK. Most manufacturers and workshops work to 3mm as the replace-now point. That 1.5mm gap looks small, but it represents a real erosion of the safety margin.
To avoid failure, inspect at every PMI, laden tests at minimum four times a year, replace at 3mm or the manufacturer's specified minimum if that figure is higher, and document all of it.
What to look out for
A daily walk-around check or a pre-trip visual will often help to spot problems earlier than the next scheduled inspection.
Noise is the obvious sign that something is amiss. A consistent squeal under braking is usually the mechanical wear indicator doing its job. It means the pad is getting low. Grinding is different and is usually lower and harsher, and means the friction material is gone and the backing plate is contacting the disc. Once you're hearing a grind, the disc is almost certainly damaged too. The repair just got more expensive.
Pulling to one side under braking usually means one pad is more worn than the other on the same axle, so the braking force is unequal. That's a calliper problem as often as it is a wear problem. Both need looking at.
Some trucks carry electronic wear sensors that trigger a dashboard light. Where fitted, the light isn't a suggestion. DAF and Volvo tend to include these on newer spec vehicles, but fitment varies by age and build spec, so don't assume yours has them because a similar vehicle does.
Through the wheel spokes with a torch, you can often get a usable visual on pad thickness before you've touched a wheel nut. If the pad looks thin against the calliper housing, or you can see the backing plate, you already know what you're going to find when you measure.
|
Inspection Aspect |
Legal / Manufacturer Limit |
Recommended Action |
Critical Warning Signs |
Hardware Components Involved |
Regulatory Requirement (April 2025) |
|
Brake Pad Thickness |
1.5 mm legal minimum (3 mm recommended workshop limit) |
Plan replacement at 5 mm; do not send vehicle out at 3 mm or below. |
Squealing (mechanical wear indicator), grinding (metal-on-metal), or dashboard warning light. |
Brake pads, electronic sensors, mechanical wear tabs. |
Unladen roller brake tests no longer accepted; minimum four laden tests per year at 65% design axle weight. |
|
Brake Disc Condition |
Minimum thickness (MIN TH) stamped on the disc hat |
Replace disc if at/below stamped limit or if deep scoring/cracking is present. |
Deep grooves (scoring), heat discolouration (blue/purple patches), or cracking near vanes. |
Brake disc (hat and surface). |
Laden roller brake tests required to confirm braking force across axles. |
|
Brake Pad Integrity |
No separation allowed |
Replace immediately regardless of remaining friction material thickness. |
Delamination or separation between friction material and backing plate. |
Friction material, steel backing plate. |
Brake performance must be assessed at every safety inspection. |
|
Calliper and Slide Pin Function |
Must move freely under light pressure |
Clean and regrease stiff pins; replace seized pins or split dust boots. |
Asymmetric wear (one pad thinner than the other), vehicle pulling to one side. |
Calliper, slide pins, pistons, dust boots. |
Laden tests required to identify imbalances that unladen tests might miss. |
|
Replacement Best Practices |
Must match OEM friction coefficient codes (e.g., GG, GF) |
Replace in axle sets; use new fitting kits; perform 30 moderate stops to bed in. |
Glazing of the pad surface if not bedded in correctly. |
Fitting kits (anti-rattle clips, springs), new pads. |
Post-replacement roller brake test to confirm axle balance for PMI records. |
How to carry out the inspection

Step 1: make the vehicle safe
Chock all the wheels. Not just the ones you're not working on. Engage the park brake. On air systems, drain the reservoirs and let the spring brakes apply fully before you go anywhere near the calliper. A spring brake releasing while your hand is in the assembly is a very bad situation.
Step 2: remove the wheel
Once the wheel is off, clean the brake dust from the assembly before inspecting. Brake dust obscures the surfaces you're trying to look at, and it's also a health risk. Use brake cleaner. Not compressed air, as that moves the dust rather than removing it.
Step 3: measure the pads
Use a vernier calliper or a dedicated brake pad gauge. You're measuring the friction material, not the total pad thickness, including the backing plate. Measure at the thinnest point, which is usually towards the centre of the pad where contact with the disc is most concentrated. Measure both inner and outer pads on each side, and record the numbers on the PMI sheet as you go.
New HGV disc pads typically start at 14 to 20mm depending on spec. Below 5mm, plan the replacement. At 3mm or below, the vehicle doesn't go out before it's done.
While you're here, check whether inner and outer pads have worn at similar rates. If one is significantly worse than the other, that's a calliper issue. Stuck piston or seized slide pin. Fit new pads without fixing it, and you'll be back in the same place within a few thousand kilometres.
Step 4: inspect the disc
Run a finger across the disc surface. You shouldn't feel grooves. Some light surface rust after standing is normal and clears on the first few stops; deep scoring won't. Look for heat discolouration (patches of blue or purple indicating hot spots from uneven pad contact) and cracking, particularly around the hat and near the vane openings.
The minimum thickness is stamped on the disc, usually on the hat, marked MIN TH followed by a figure in millimetres. At or below that number, the disc comes off.
Step 5: check the calliper
Seized or stiff slide pins are one of the most common calliper problems on HGVs. When the pin can't move freely, the calliper can't float, and one pad ends up doing most of the braking work.
That's what creates the asymmetric wear pattern described above, and it also means the total clamping force is less than it should be. Press on each pin by hand. Light pressure should move it. If it’s stiff, clean and regrease. If it’s seized, replace it.
Check the dust boots while you're there. A split boot is the direct route to a seized pin because it lets water and contamination into the pin housing. They're cheap to replace. A seized calliper is not.
Step 6: check the backing plate
Look carefully at the joint between friction material and steel plate. Delamination often starts at the edges before it becomes visible across the full face of the pad.
If there is any separation at all, replace the pad immediately, regardless of remaining thickness. A delaminating pad can shed material onto the disc mid-stop, and the braking becomes unpredictable.
Step 7: record the findings
Everything goes on the PMI sheet with the correct classification. A defect means the vehicle stays off the road until it's fixed. An advisory means action before the next inspection.
Getting this classification right matters, because DVSA examiners read maintenance records and they can tell the difference between a well-run regime and one that's just going through the motions.
Reading the thickness numbers
The 3mm threshold is a general industry figure, while the legal minimum is 1.5mm. Manufacturer minimums are stamped on the disc or listed in the service documentation and vary by vehicle and axle position.
For most DAF, Volvo and Mercedes disc brake axles, the manufacturer's minimum is in the 2 to 3mm range, but check the specific spec rather than assuming. If the manufacturer says 3.5mm for a particular axle, that's your limit.
If the inner pad is at 4mm and the outer is at 8mm, you do not have 4mm of usable life left on that axle. You have a calliper problem, so fix it before fitting new brake pads.
Also, measure at the thinnest point on the pad, not the thickest. Pads wear unevenly, so measuring at the thick end and recording that number is not an accurate assessment of pad condition.
Replacement: doing it properly
Replace pads in axle sets. One new pad on the nearside and one worn pad on the offside create a braking imbalance. In normal driving you might not feel it, but in a full emergency stop at 60mph it's a different matter.
Whether to replace the discs at the same time comes down to their condition. If the surface has scoring you can feel with a fingernail, if the thickness is close to the minimum, or if there's cracking visible, fit new discs.
New pads on a scored disc won't bed in correctly; they'll wear faster, and the braking performance will be below spec. On a high-mileage vehicle it's usually cheaper in the long run to do both at once.
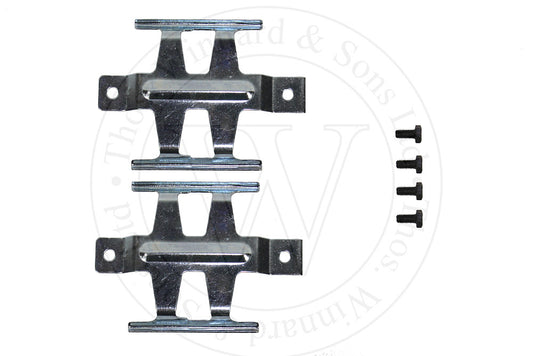
While you're ordering pads, order the fitting kit too. An HGV brake pad fitting kit typically includes the calliper slide pins, anti-rattle clips, retaining springs, and securing hardware. These components hold the pad firmly in the calliper bracket and allow the calliper to float correctly as the pad wears.
Worth noting is that some brake pads come supplied with a fitting kit included, while others don't, so check before you order. Where kits are listed separately, Truckstop stocks fitting kits to match the pad ranges they carry, including options covering GEN1 and GEN2 calliper variants on certain applications, which avoids the problem of ordering a kit that doesn't fit the calliper generation on your specific vehicle. Disc fitting kits are also available separately for when the discs are coming off at the same time.
Bed the pads in before the vehicle goes back into service. This step gets skipped more often than it should. The bed-in process transfers a thin, even layer of friction material from the pad onto the disc surface.
Without it, the pad can glaze, the surface hardens, and braking efficiency drops. Getting glazing off requires either heavy braking runs or machining the disc, neither of which is a good use of time. The standard bed-in is around 30 moderate stops from about 30 km/h with cooling time between each.
After the job, do a roller brake test. It confirms balance across the axle, checks the callipers are applying correctly, and gives you a clean test result for the PMI record. If something went wrong during the replacement, you find out now rather than at a roadside check.
Choosing the right brake pad
The friction material is engineered to work within a specific temperature range and against a specific disc specification. Fit the wrong friction coefficient and you'll affect braking performance, accelerate disc wear, or both.
The friction coefficient is marked on the pad as a two-letter code: FF, FG, GF, GG and similar. The first letter is cold performance, the second is hot. Match the code to what's specified for the axle position. Front and rear specs are often different on the same vehicle.
For DAF vehicles, Wabco and Knorr-Bremse supply the original equipment. Volvo uses its own branded components, but the underlying hardware on many models traces back to the same manufacturers.
Scania, MAN and Mercedes-Benz each have their own specifications, so check the axle spec before ordering rather than assuming a physically compatible pad will perform correctly.
Truckstop carries brake pads for major HGV brands from OEM suppliers, including Wabco and Knorr-Bremse. Same-day delivery or click and collect from our branches.
If you need to confirm the right spec for a particular vehicle and axle configuration, get in touch and we can help you to find the right part.
Shop HGV brake pads at Truckstop Group
Find more insights, news, and information in the truck industry at our Truckstop Group News Page.
Five HGV Parts You Need to Know About Before They Fail | Vehicle Battery Guide: Capacity, CCA, and What Actually Matters | UK Truck Safety Technology In 2026: What You Need To Know